11 April 2014

The Great British Sewing Bee - Week Eight Recap


Seven weeks have passed and we've said farewell to seven contestants.  Along the way we lost Cliff, Simon, Julie, Cerina, Jenni, David and Lynda.  So, after all that sewing and crying, here are the grand final contestants.


Image Source - BBC ©

Out of the three remaining contestants, my favourite is definitely Chinelo.  She has flair, creativity, originality and style.  I also love that she does freehand cutting, and doesn't rely on patterns.  Tamara's choices are often a bit outlandish, and I'm not keen on the shapes she creates.  Heather is a very accomplished sewer, but her fabric and pattern choices are often old fashioned and dowdy.  Unlike a show such as Project Runway, this show isn't primarily about design and fabric choices.  It is, at its heart, a show about sewing skills.  This does skew the judging towards the most well executed garments, not necessarily the most fashionable or stylish.  It'll be interesting to see how the grand final episode plays out.

So, armed with a cup of tea and a slice of cake, I'm settling onto the sofa to enjoy the next hour of sewing challenges.

Image Source - GBSB Facebook Page

This week's challenges are all couture based challenges.  There's going to be lots of hand sewing, exquisite finishing, and a focus on attention to detail.

The Challenges 

1. Sewing from a Pattern

Sew a mens silk tie (techniques include working with silk, hand sewing an invisible seam and bar tack) in 3 hours 15 minutes.

The pattern was a basic mens tie.  It was cut on the bias in two sections, and then two additional sections were added to line the tip.  When they announced the challenge, and said the contestants had over three hours to sew the tie, I was thinking it would be a piece of cake.  Seriously, how hard can it be to sew a tie?  Apparently, it's quite tricky!

The fabrics available were not hugely exciting. Heather chose a nice red and orange geometric print, and Tamara chose a nice silver and blue stripe.

Chinelo had great difficulty deciphering the pattern, and could not figure out how to sew the mitred tip of the tie.  After being reduced to tears, Patrick came to the rescue and pointed her in the right direction.

No one deviated from the pattern.  By this stage in the competition, contestants seem to understand that this challenge is all about following instructions to the letter.  They aren't going to get extra points for going off piste and adding their own dramatic flair.  The only person who didn't produced a finished tie was Chinelo, whose tie was still pinned together.

Image Source - BBC ©


The judges comments were:

  • Chinelo - Patrick is pretty disappointed in Chinelo's efforts "we don't have an assembled tie."  The shape of the tie was pretty good. the tip was constructed correctly, but there is no hand sitting.  
  • Heather - the hand stitching was quite untidy with long, uneven stitches.  The body of tie was working properly, the tip was good but a little bumpy, it had been well pressed and the silk was not crushed.  Patrick's opinion - "not bad at all."
  • Tamara - it was a pretty even tie.  The pattern was running perfectly parallel with the corner of the tie, the hand stitching was really good, the tipping was neat, and there was a bar tack (although not neatest Patrick had ever seen).  Patrick - "a wearable piece of mens wear."


The results were Chinelo in third place, Heather in second, and Tamara in first.

Image Source - GBSB Facebook Page

2. Alter a Basic High Street Item

Take a wedding dress and transform it into a special occasion dress for a girl in 2 hours.  

Contestants were given six used wedding gowns to choose from.  Patrick was hoping to see a complete re-imagining of the dresses - not just having them cut down to a smaller size.  Both May and Patrick thought the challenge should be handled sympathetically, and pay tribute to the work that would have gone into the original dress.  These statements were immediately followed by footage of contestants hacking their dresses apart, and discussing how guilty they felt.

If a challenge like this interests you, it's often very easy to pick up an old wedding dress in a thrift store.

The contestants made the following garments:
  • Chinelo - made a classic bridesmaids dress with a circular skirt, fitted bodice with short sleeves, under skirts and re-used some flower embellishments from the original dress.  Her entire dress is drafted from scratch, and looked fabulous.
  • Heather - made a gathered skirt and a simple blouse.  She tried to draft a blouse by draping it on the stand, but ended up having to start again.  Her final blouse was a bit like a pillow case with puffy turn-ins on the sleeves, and  bias edged neckline.  It was very boxy and the sleeves looked unfinished.
  • Tamara - made a dress by cutting down the original skirt.  She then added a simple bodice and hand sewed some gathered tule across the shoulders, and added a bow on the front.  The finished dress looked a little messy and poorly sewn.

Here's a few quick snaps of the three designs:

Image Source - BBC ©


The judges comments were:


  • Chinelo - a fine rolled hem done on the overlocker, beautiful set in sleeves, facing on neck sitting neatly.  May -  "I think that's a really well executed little dress."
  • Heather - a sweet little silk skirt with fabulous gather, but there is no fastening, binding around the neck is good, but a little too square, the sleeve has been left soft.
  • Tamara - there were no edge finishes on this on - they were just cut. The bodice was nicely shaped, and the shoulder straps had been hand stitched onto bodice.

The results are Tamara in third place, Heather in second and Chinelo in first.

Image Source - GBSB Facebook Page

3. Sew a Showstopper

Sew a stunning gown, showcasing couture skills, to fit a real model in seven hours.

Models were best friends of each contestant.  There was much shock and a few moist eyes when the models walked into the workroom.  Contestants were asked to design their own dresses, and were allowed to cut out their fabric at home.

The contestants made the following garments:
  • Chinelo made a figure hugging gown with an invisible mesh bodice covered by hand sewn lace flowers, a fitted satin skirt ending in a tulle fish tail.  Chinelo sewed to the very last minute, trying to get all those lace flowers attached.
  • Heather made a black and red silk gown with a sun-ray pleated front bodice, layers of skirts, a silk bustle and the back finished with a silver chain (that is some part of a horses tack).
  • Tamara made a dress I can't even begin to describe.  It was a lurid floral fabric made into a dress with an empire line waist, stretchy electric-blue racer back, knee length pleated skirt, a layer of printed stretch fabric over the front bodice that had been randomly slashed with a razor and cheap looking fake flowers scattered across the dress (attached by a glue gun).  It was certainly different, completely hideous, and I'm fairly sure that using a glue gun is not a couture technique. 

Here's a few quick snaps of the three designs:

Image Source - BBC ©


The judges comments were:


  • Chinelo - May thought it was a "very beautiful dress, fits your model beautifully", a really successfully execution, fix tail is a bit overpowering, seams on shoulder are a little too robust, a really beautiful looking dress, a lot of work in a short space of time.
  • Heather - the sunday pleating was secured perfectly and stitching was almost invisible, fluted rolled hem is a lovely effect, a lot of hand sewing and gathering, the removable bustle was great, and Patrick liked the plumpness of the bustle, the chain adds a nice edge to quite a soft gown.
  • Tamara - May started by congratulating Tamara on a well inserted zip. The racing back fits beautifully, Patrick and May were sad to see crystal organza not included in the final garment, they were disappointed that the flowers were not hand sewn, and mentioned the slashes were not neatly done.  

The Final Results

The contestants went off for a coffee and past contestants, friends and family arrived in the sewing room to have a look at completed garments.  The eliminated contestants gave their opinions on the likely winners:

  • Cerina didn't want to guess, and thought the judges would have a hard time.
  • Julie had her money on Chinelo.
  • Jenni couldn't decide between Chinelo and Heather.
  • Lynda didn't think she could possibly pick a winner.
  • Simon thought Heather had a spark that might see her win.
  • David was keen to see Tamara win.


The judges discussed the weekend's work and tried to decide who would be the winner of season two.  This is what they discussed:
  • Chinelo - bridesmaid dress was really good, beautiful flair and execution, looked great on her model.
  • Heather - a good job of following the tie pattern, a good bridesmaid dress, her final dress was a real show stopper after weeks of playing it safe.
  • Tamara - a good job of following the tie pattern, a good bridesmaid dress, her couture gown was a great idea, but the execution really let her down.

The contestants were then called back in to hear the results.  After many pauses, and much building of drama, the winner was announced - Heather.  Heather's reaction was really funny.  She was totally expecting it to be someone else, and was completely agog when they called out her name.

Image Source - GBSB Facebook Page

Final Thoughts

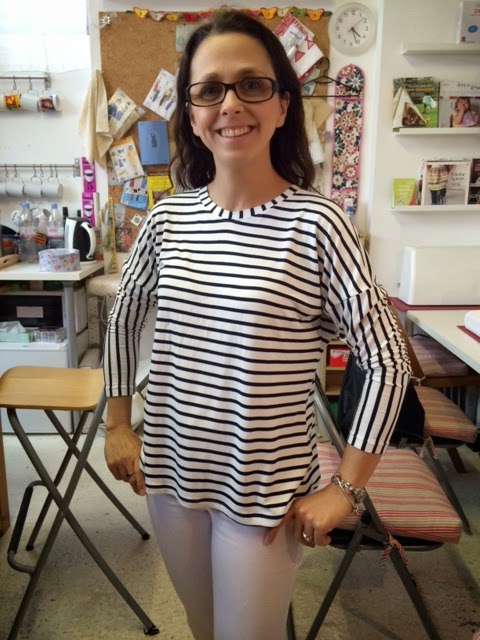
This really has been a fun series.  It's got me really excited about sewing, and I've even made a couple of my own Great British Sewing Bee inspired tops.  I hope you have enjoyed the series too.  For those of you who don't know, there is a book out, which includes pattern sheets.  I have heard that The Book Depository have it at a very good price.  I got my copy from Amazon for only £12.

Image Source - Amazon.co.uk

A big congratulations to Heather.  While her choices have often been safe, she is a very skilled sewer, and her final dress really was a knock-out.

Image Source - GBSB Facebook Page


Want to Read More About GBSB?

You might also like to check out these other blogs that have done some posts about this episode:

  • The Thrifty Stitcher - Claire-Louise Hardie is the Sewing Producer for The Great British Sewing Bee, and usually does posts about the patterns used in the first challenge on each episode, and also has some nice posts about techniques used. 
  • Little Black Duck  - Victoria Peat has posted some great links to tutorials that cover some of the techniques you can use to make your own GBSB inspired pieces.
  • The Mighty Mighty Monk Seal - Steve & Chris present a very witty recap, which is written as fans of reality television review, rather than as sewers themselves.
  • Stitch Craft Create - Jen write a short recap each week.
  • The Sewing Directory - each week an episode recap is posted, along with loads of useful links to patterns and techniques.  There is also an archive of recaps from Season 1.

    If you know any more blogs with interesting recaps or useful advice related to the GBSB, leave me a message and I can include a link.
    read more "The Great British Sewing Bee - Week Eight Recap"

    07 April 2014

    Small Girls Let Loose on a Sewing Machine


    Olivia and Samantha are both very keen to learn how to sew.  A while ago Olivia made a simple skirt:


    It was a great first sewing project, as it mostly involved sewing straight lines.  She really enjoyed it, and has been desperate to make something else.  I wanted to find a project that the girls could work on together, that would involve relatively straightfoward sewing.  I've been eyeing this simple quilt for a while now:

    Sew Mama Sew

    I've never sewn a quilt before, but this one looks really straightforward.  We began by choosing fabrics.  This is what we ended up with:


    The two lime green fabrics and the aqua fabric came from The Village Habadashery in West Hampstead and the rest of the fabrics came from Rolls and Rems in Holloway.  I decided to make smaller squares than the quilt on Sew Mama Sew, and ended up cutting 8" squares in each colour (8 of each).  The girls took turns designing each row of the quilt.


    They then took turns sewing rows together.  I pinned each piece and drew a pencil line where they should sew.  Olivia managed the sewing really well and was able to work with me sitting next to her.  Samantha sat on my lap and took turns either doing the foot pedal or holding the fabric.  It took us several days, but we finally pieced the whole quilt together, without muddling up pieces or messing up the pattern they had chosen. 


    I found a really nice extra-wide backing fabric online from Eclectic Maker:

    Eclectic Maker - Extra-Wide Quilt Backing

    I chose the extra-wide backing so there wouldn't be any joins in the backing fabric.  Unfortunately I made a mistake in my order and didn't purchase quite enough, and had to join an extra strip on the back!  So frustrating!!

    I decided not to sew the layers together using the same method as the Sew Mama Sew tutorial (right sides together, then turn right side out and edge-stitch).  Instead I wanted to use traditional machine quilting, and a bias edge.  I was really lucky to have my lovely mother-in-law visiting (who is a very experienced quilter), and she helped me put together the layers and do the hand basting.  She also gave me help with the machine quilting.  I chose to do a very simple quilting pattern and just stitched a row on each side of the seam lines a 1/4" from the seam.


    Unfortunately, I didn't get the whole thing finished while she was here, and ended up having to do the binding myself.  I headed to Google and looked up techniques for how to apply quilt binding.  I found a really easy tutorial here on Cluck Cluck Sew.

    I took the girls back to The Village Habadashery and we chose a nice aqua spotted fabric for the binding.

    Quilt Binding - The Village Habadashery

    I cut 2.5" strips and joined them together.  I then used the exact method outlined in the Cluck Cluck Sew tutorial to add the binding.  Unfortunately my final row of stitching wasn't as neat as an experienced quilter and you can see the stitching line wandering a bit around the edge of the binding on the front.


    Here's the finished quilt.


    I'm so proud of the girls.  They did such a great job making this quilt.  They love it so much.  It's so special watching them snuggled on the sofa together under their very own quilt.
    read more "Small Girls Let Loose on a Sewing Machine"

    04 April 2014

    Making a Classic Breton Tshirt at The Thrifty Stitcher


    This weekend I attended a workshop at The Thrifty Stitcher in Stoke Newington, learning how to make a classic Breton tshirt.  The class was run by Melissa Fehr of Fehr Trade.  It was a nice small class, with only four students - Amy, Charlene, Louise and myself.  It was great spending an afternoon with fellow sewers.  We chatted about all sorts of things from sewing machines, to sewing tables and spaces, and spent a while talking about my favourite topic at the moment - The Great British Sewing Bee.  If you are interested in doing some Great British Sewing Bee inspired makes, keep an eye out on The Thrifty Stitcher website.  There may be more workshops coming.

    We started by choosing our fabric.  Melissa had three different stripy knits to choose from - two blue/white and one red/white.  I chose a lovely blue/white stripe with a four way stretch which came from Tissu.  It's a great quality fabric, with a nice silky feel.


    We were given a pattern in four sizes.  The pattern was for a "slouchy" style of tshirt, with dolman sleeves.  We were able to try on some sample tshirts to work out which size to cut.  Melissa had very kindly stuck the printed the patterns together for us - a task really don't like.


    As my fabric had a four way stretch, I could add the sleeves with the stripes running along the arm, or around the arm.  I decided to try them running along the arm, so that the stripes matched in with the body of the tshirt.  We all cut out our chosen fabric then headed to the overlockers to sew the pieces together.  This was the method we used for piecing our tshirt:

    1. Overlock front and back bodice pieces together at shoulder seams.
    2. Overlock short ends of neckband together to form a loop.
    3. Fold neckband in half lengthwise and overlock neckband onto the bodice.
    4. Overlock sleeves onto bodice.
    5. Overlock side of bodice and sleeve seams.
    6. Turn up hem and sleeves by 2cm and stitch with a twin needle.
    7. Top stitch neckline so that neckband seam is secured against the bodice fabric.


    Overall it was a very easy make.  Unlike at home, the twin needle stitching was really neat and didn't pucker the seam, or unravel.  The neckband also looked very neat.  This is my finished tshirt.


    It's probably a bit "slouchier" than I would normally wear, but I was really pleased with how it turned out.  I'm also feeling a lot more confident about sewing with knits.  All up, I think this was a great course.  The small class size, meant you got lots of individual attention, and could ask as many questions as you wanted.  It was also nice that everything was provided, even the fabric.  I would highly recommend checking out The Thrifty Stitcher courses yourself.
    read more "Making a Classic Breton Tshirt at The Thrifty Stitcher"

    03 April 2014

    The Great British Sewing Bee - Week Seven Recap

    It's semi-finals week, and I am more than usually excited!!!

    I had the great fun of attending a sewing class this weekend, and we spent ages chatting about the Great British Sewing Bee.  The consensus was that it was a terrific show, and was inspiring sewers to get their machines out and start sewing.  There's some negative press out there (why does the Daily Mail have to keep publishing those negative, snarky articles by Jim Shelly?), but on the whole there's lots of genuine excitement for the show.  It really was great to talk to other people who are enjoying the show as much as I am.

    Before I get started on this week's episode, I thought you might be interested to know where you can learn more about the four remaining contestants.
    • Chinelo Bally can be found on her own website (where she has tutorials for freehand drafting and is also offering her own class this weekend)
    • Heather Jacks can be found on Facebook and her own website (she is planning to get into fabric and pattern design)
    • Lynda Lewis can be found on Twitter
    • Tamara Melvin can be found on her own websiteFacebook and Twitter (she will be offering tutorials and a blog about re-sewing, re-using and recycling clothes) 

    To kick things off, these are our four contestants:

    Image Source - GBSB Facebook Page

    The Challenges 

    1. Sewing from a Pattern

    Drape a dress using 3m of fabric, pins and a dressmaking form (techniques must include cutting, draping, pleating, shaping and gathering) in 3 hours.

    Surprisingly this week's pattern challenge didn't involve a pattern at all.  Contestants were asked to select 3m of fabric and making a dress with draping and pleating, using a dressmaking form.

    There was only one fabric choice this week that I didn't like, and that was Heather's.  It was a satiny, floral print in a really drab colour.  Chinelo chose a lovely orange large print floral, Tamara chose a red and white floral, and Heather chose my favourite fabric with a cream and black wavy print.

    Probably the most difficult part of this challenge is that none of the contestants seem to have done much, or any, draping using a dressmaking form.  Chinelo was obviously the most confident, given that she doesn't generally work from patterns, but she seemed less sure of herself than usual.

    Lynda draped a strapless maxi dress with a high waist, and a big floppy "bow" detail.  Heather made a sleeveless, cowl neckline dress with a pleated, knee-length skirt.  Tamara made a sleeveless knee-length dress using pleating and tucking.  Chinelo made a strapless maxi dress with an empire-line waist and a drapey, "tulip" skirt.

    Here's a few quick snaps of the four designs:

    Image Source - BBC © 

    The judges comments were as follows:
    • Chinelo - Patrick wasn't sure that the skirt worked as it wasn't a proper tulip shape. May really liked it.  The judges noted that it wasn't completely symmetrical, and almost worked.  They commented that it wasn't evenly sewn and was a bit "lumpy bumpy".
    • Tamara - tucks wer used for shaping at waist and under the arms going in different directions.  May felt they were sometimes fighting with each other.  Patrick felt it was a little too over tucked, and that a dart would have cleaned it up and given the draped sections more impact.
    • Heather - using a bias cut on the bodice meant the front is sitting well.  May loved the draped neckline and felt it worked well.  The judges liked the nice even pleats, which gave the back a good shape, but there was a giant pleat on one side (which Heather made to take in extra fabric) which had got caught inside.
    • Lynda - The skirt looked balanced and flowed well, the bodice fit really well and was well executed.  Patrick thought it was a dry good demonstration of how you can build something on the mannequin.

    The results from 4th place are Tamara, Chinelo, Heather in second, and Lynda in first.

    2. Alter a Basic High Street Item

    Take a sleeveless dress and add sleeves in 1 3/4  hours.  

    Image Source - Polyvore

    Contestants were given a basic fitted, grey, sleeveless dress and asked to add sleeves.  They could use any fabric or trim from the haberdashery.  The judges were going to be looking for symmetry and a good finish.  May pointed out that contestants need to make sure they measure the depth of the armscye, the circumference of the armscye and the circumference of the arm in order to get perfectly fitting sleeves.  She thought that this was the most difficult alteration challenge they had been given, because they need to draft a pattern from scratch, and the judges wanted precision.

    Each contestant had a very different approach to the challenge:
    • Chinelo added short sleeves with a tucked detail on the top in a bright geometric print. 
    • Tamara added short sleeves with a gathered top, button cuff and large cutout feature above the cuff button in a scalloped stripe, pastel print.  She knew what a sleeve pattern should look like, but had never drafted one before.
    • Heather added long sleeves with a gathered top in a blue, spotty fabric.  
    • Lynda added long, fitted sleeves with a buttoned cuff in a drab mauve fabric.  She had also never drafted a sleeve before.  Lynda alarmed Claudia but admitting that she had measured-ish and drafted-ish her sleeve.

    Here's a few quick snaps of the four designs:

    Image Source - BBC © 

    The judges comments were as follows:
    • Chinelo - Patrick thought it was a different choice of fabric, but he liked it.  The judges noticed the pink stripe that was perfectly centred, and ran vertically down the sleeve, both sleeves were identical, and the seams were smooth.
    • Tamara - The shoulder pleats were evenly done, there was nice topstitching on the cuffs and cutout opening, but the sleeves were not vertical, and pitched slightly forwards.
    • Heather - Patrick's eagle eye noted that the sleeve lengths appeared uneven and whipped out a tape measure - 1/4" longer on one sleeve!  The judges noted that the pattern of dots on the sleeves ran perfectly vertical, the shoulder lines were very smooth, and there was no distortion.
    • Lynda - One sleeve was lovely, and one was pulling out of shape.  One cuff was neatly done and one was uneven.  Patrick noted that the button holes had been sewn across the cuff, instead of around.

    The results from 4th place are Lynda, Tamara, Heather in second and Chinelo in first.

    Image Source - GBSB Facebook Page

    3. Sew a Showstopper

    Copy a favourite item of clothing in 6.5 hours.

    Contestants were asked to bring in a favourite item of clothing, and to recreate it.  Contestants were not allowed to bring in patterns.  They either had to draft a pattern on paper, or take a pattern from the original garment (using a method like rubbing off).  May felt that this challenge would demonstrate a useful set of skills.  Lots of people have a garment in their wardrobe they love, and would want to recreate.  Patrick thought this was a substantially difficult challenge.  It's not just tracing an outline of a garment.  There needs to be an understanding of how the geometry of the garment construction works.

    The contestants made the following garments:
    • Chinelo copied a boned, strapless party dress which had a semi-circular skirt decorated with rows of ruffled chiffon - 42 rows!  The recreated skirt was made from strips of flat organza with an ombre effect from cream to black.  Patrick thought she was absolutely crazy to make a skirt with so much work involved.  Chinelo drafted her pattern by measuring the original dress, and drafting a paper pattern.
    • Tamara copied her favourite yoga outfit which featured a top made from 22 panels.  She tracked her pattern onto micro fibre cloth by feeling for the seams and drawing around the shapes.  Tamara had chosen a range of fabrics for her top, and had to be very careful to manage the different stretches.
    • Heather copied a simple fitted, sleeveless shift dress.  She made her pattern by sewing darts into a draft fabric first, then laying it on the original dress to trace the outline.  Once this was done, she unpicked the darts to reveal her pattern.  Heather was worried that her dress was much too simple, compared to the other contestants, and wanted to make sure she achieve a perfect finish.
    • Lynda copied her favourite knit wrap dress.  She took measurements and drew a rough plan on paper.  She then began tracing her dress onto the new fabric with chalk.  Lynda was halfway through cutting when she realised she had not bought enough fabric.  Patrick and May allowed Lynda into the haberdashery to pick a new fabric.  Unfortunately there didn't seem to be a huge selection of knit fabric available, and the fabric Lynda chose was softer and more mobile than her original fabric.

    Here's a few quick snaps of the four designs:

    Image Source - BBC ©

    The judges comments were as follows:
    • Chinelo - the top is nicely balanced and fits well, some of the sewing is a little uneven, the layers on the skirt are attached evenly, and the ombre grading in the skirt works really well.  May preferred the copy to the original garment, and Patrick thought Chinelo had updated the dress and made it more refined.  I couldn't help noticing the threads hanging off every row of chiffon.  Perhaps if the strips had been bias cut, or cut from a non-fraying fabric, the finish would have been neater.
    • Tamara - the garment works incredibly well and fits perfectly.  Tamara made a multi-panelled, multi-fabric garment and everything is sitting where it should.  May liked the 3-step zig zag top stitching.  I thought the copied garments looked much stiffer than the original yoga clothes.  
    • Heather - the fit is a bit disappointing.  It's tight around the hips and wrinkling across the back.  May suggested Heather may have taken the hips in too much, or made it too long in the back bodice.  Patrick noted that one shoulder is a fraction off, and is sitting up.  Overall it was an extremely accurate copy.
    • Lynda - May commented on the nightmare of a day for Lynda.  While the skirt pleats are even and well spaced, the waistline is "going for a bit of a walk".  The pattern was matched well on the seams, but it was tipping forwards.

    The Final Results

    The contestants went off for a coffee, while the judges discussed the weekend's work.

    The judges commented on how everyone had varied from challenge to challenge:

    • Heather - they are not mad about her copied dress.  It didn't fit at all well, and was the simplest garment.
    • Lynda - she has been terribly inconsistent.  She won the first challenge and the judges thought her dress was excellent, but she made a big mistake in the construction of her copied dress.
    • Tamara - she didn't do well on the first two challenges, but her yoga outfit was brilliant.


    The contestants were then called back in to hear the final results:

    Garment of the week went to … Tamara for her yoga outfit.

    Image Source - GBSB Facebook Page

    The contestant leaving this week was … Lynda

    Image Source - GBSB Facebook Page

    Final Thoughts

    I'm so sad to see Lynda leaving.  She was definitely the most inconsistent of the remaining contestants, and frequently went from top to bottom throughout an episode.  I think if Tamara hadn't made such a complicated and successful yoga outfit, it would very likely have been her leaving this week.

    We were given a very vague sneak peek of next week, that involved yards of tulle, dresses that looked suspiciously wedding themed (perhaps flower girl and bridesmaids), and Chinelo wishing it was over and having a teary moment.  As much as I'm looking forwards to the grand final, I don't want the show to be over.

    Want to Read More About GBSB?

    You might also like to check out these other blogs that have done some posts about this episode:

    • The Thrifty Stitcher - Claire-Louise Hardie is the Sewing Producer for The Great British Sewing Bee, and usually does posts about the patterns used in the first challenge on each episode, and also has some nice posts about techniques used.  She has posted some tips and links for draping and copying existing clothes this week.
    • Little Black Duck  - Victoria Peat has posted some great links to tutorials that cover some of the techniques you can use to make your own GBSB inspired pieces.
    • The Mighty Mighty Monk Seal - Steve & Chris present a very witty recap, which is written as fans of reality television review, rather than as sewers themselves.
    • Stitch Craft Create - Jen write a short recap each week.
    • The Sewing Directory - each week an episode recap is posted, along with loads of useful links to patterns and techniques.  There is also an archive of recaps from Season 1.

      If you know any more blogs with interesting recaps or useful advice related to the GBSB, leave me a message and I can include a link.
      read more "The Great British Sewing Bee - Week Seven Recap"

      01 April 2014

      Handy, Homemade Tray


      I have been searching for ages for a simple tray to put on the dining room table to hold the salt and pepper, napkins and water jug.  It needed to be small (22x18cm) and I wanted it to have reasonably high sides (about 5cm).  Every tray I found was either too big, had shallow sides or was just plain ugly. In the end I decided I would just have a go at making one.

      I started with this:


      and ended up with this:


      It was actually a very easy project, and only took a few days.  Most of that time was waiting for glue to dry.  I started by gathering up my hoarded supply of thick cardboard.  You can find this thick cardboard on the back of some notebooks (it's about 2mm thick).  I used to work in an office where the weekly supply of payslips was delivered with this cardboard used as dividers.  I saved a huge stack of them, but now I'm down to my last three.

      The next step was to cut two base pieces - I cut mine 22x18cm.  I smeared a thin coat of UHU All Purpose Glue on one side of each piece, waited 10 minutes, then stuck them together.  I used this method of glueing for all the box construction.

      I then cut four pieces 18x5cm and four pieces 22.8x5cm.  The extra 8mm (the thickness of two layers of card) allows the corners to meet flush.  I then used the same glue method above to make two double thickness short sides and two double thickness long sides.

      Once the sandwiched layers were dry, I added glue to the edges of the base and the sides, and glued them together.  Some masking tape on the corners held the box tight while it dried.


      I now had a sturdy box, exactly the right size.  The next step was to make it pretty.  I used Decopatch supplies to cover the box.  I'm reasonably sure you could use regular wrapping paper, tissue paper or fabric and Modgepodge, but Decopatch is what I have readily available at my local craft store.  I started with these supplies.


      Decopatch is very easy to do.  There's a tutorial on their website.  You just paint a thin layer of glue (the pink bottle) on a small patch of the item you're covering.  You then place a small piece of torn tissue paper (Decopatch recommend about a postage stamp sized piece) on the glue, and smooth it down with a very light coat of glue.  You keep applying tissue paper in this way, overlapping each piece, until the whole surface is covered.  I ended up doing two layers, as the box looked a little patchy with only one layer.  Once the box was thoroughly dry, I used the Satiny Sealing Varnish (the gold bottle) to paint two layers of varnish on the tray.


      I now have a pretty and neat tray for all the things that live on our dining room table.  One of the best things about this project, was the cost.  The cardboard was free, I already had the Decopatch and UHU glues, and I just had to purchase four sheets of Decopatch paper (£4).
      read more "Handy, Homemade Tray"

      The Cupboard Under The Sink

      We don't have a lot of storage space in our kitchen, so every cupboard seems to be crammed with so many things, it's hard to keep it tidy.  The cupboard under the kitchen sink is one cupboard that really annoys me.


      I know it's not that bad.  Things are in containers and baskets, but it doesn't look nice and it's annoying that so many things have to be stacked to fit in there.  We live in a rented house, so I can't install shelves, or do anything permanent.  

      I started by emptying and cleaning the cupboard.  I carefully took a photo of the empty cupboard, so you could see that broken wall at the back, but then I accidentally deleted the photo!  The first thing to fix was that hideous broken wall.  I've been looking at it for three years.  I bought a two sheets of white foam core from the local craft shop.


      I carefully measured and cut the board so that it would fill in the back wall of the cupboard.  Because of the pipes I had to do it in three sections.  You can probably see where I accidentally wrote down a measurement as 6" instead of 9" and cut and extra square out above that pipe!  


      The cupboard already looks so much neater.  I bought two sheets of this wrapping paper to line the shelf.


      I added a layer of self-adhesive book covering to the paper before I stuck it down with double sided tape.  


      I then grabbed a large wooden wine box I got from the local wine shop.  I knocked out the bottom of the box, spray painted it white, added some wrapping paper and popped it in the cupboard.


      I was now ready to put everything back in the cupboard.


      For a finishing touch I added some labels.


      I haven't been able to do anything about those few things stacked in the back of the shelf, but I don't use any of them very often, so it's not a big problem.  I love how much neater this cupboard is now.  I like the fact that two of the most often used tubs (the disposable gloves and dishwasher tablets) are now side-by-side, instead of on top of each other.

      Just to finish off, here's my before and after photos.


      read more "The Cupboard Under The Sink"